Frequently asked question
What geoprocessing tools can be used to combine data in ArcGIS Pro?
In ArcGIS Pro, combining data such as point feature classes with a polygon feature class is useful if the data are stored in different files or tables, as it is easier to analyze the data in a single dataset.
This article provides workflows to combine data using different geoprocessing tools depending on the data types in ArcGIS Pro.
The Overlay Layers tool
The Overlay Layers tool can be used to overlay multiple feature classes into a new feature class and create new attributes for the layer. This tool combines different feature classes such as points, polygons, or areas into a single set of the feature class.
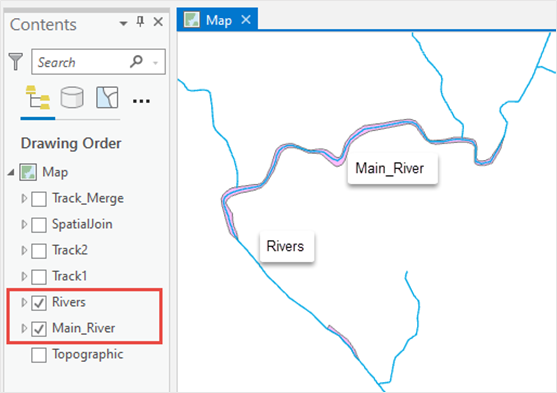
In this example, the Main_River layer overlays the polyline layer, Rivers, and the Overlay Layers tool is used to create a new feature layer to display the intersection of the two layers in ArcGIS Pro.
- Open the ArcGIS Pro project.
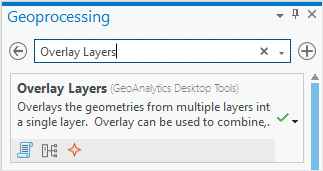
- In the Geoprocessing pane, search for and click the Overlay Layers tool. Refer to ArcGIS Pro: Run a tool in the Geoprocessing pane for steps to do this.
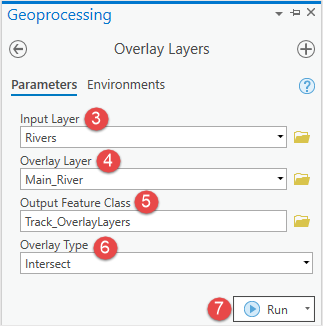
- In the Overlay Layers pane, under the Parameters tab, select the feature layer from the Input Layer drop-down list. In this example, Rivers is selected.
- Select the feature layer to overlay the input feature layer with from the Overlay Layer drop-down list. In this example, Main_River is selected.
- Provide a name for Output Feature Class, and click Browse....
 to specify the location of the output feature class.
 - Select the preferred Overlay Type. In this example, Intersect is selected to display the overlapping area between the layers. Refer to ArcGIS Pro: Parameters for more information.
- Click Run. The new feature class created by the Overlay Layers tool is automatically added to the map.
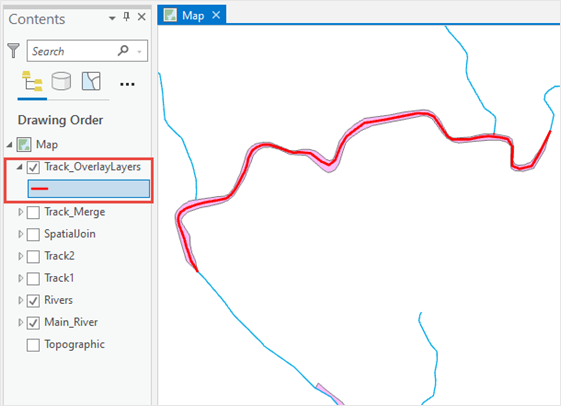
The image below shows the layer, Track_OverlayLayers, displaying the intersection between the Main_River and Rivers layers in ArcGIS Pro.
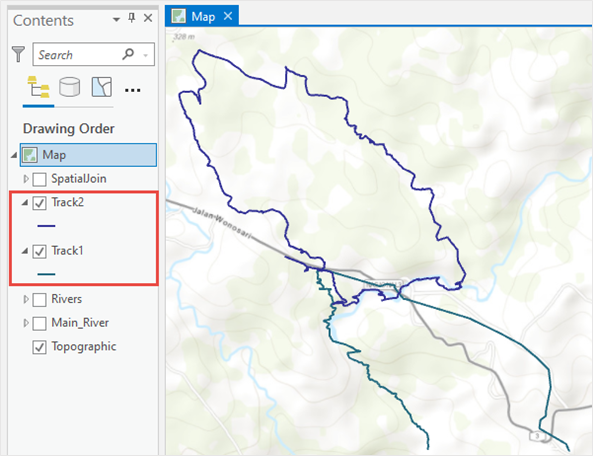
The Append tool
The Append tool can be used to combine multiple datasets with an existing target dataset that modifies the input data. The input dataset can be feature classes, tables, shapefiles, rasters, or dimension feature classes. However, the input and target datasets must be of the same data type, for instance, rasters appended to an existing raster dataset.
In this example, a line feature class, Track1, is appended to another line feature class, Track2, in ArcGIS Pro.
- Open the ArcGIS Pro project.
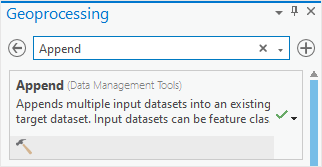
- In the Geoprocessing pane, search for and click the Append tool. Refer to ArcGIS Pro: Run a tool in the Geoprocessing pane for steps to do this.
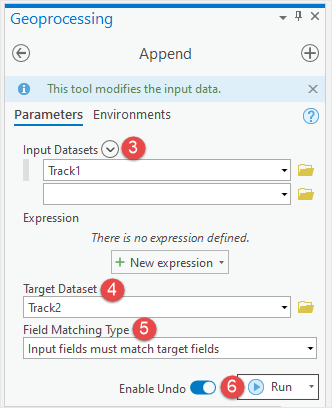
- In the Append pane, under the Parameters tab, select the feature layer from the Input Datasets drop-down list. In this example, Track1 is selected.
- Select the target dataset wherein the input data is appended from the Target Dataset drop-down list. In this example, Track2 is selected.
- Select the matching field type from the Field Matching Type drop-down list. Refer to ArcGIS Pro: Parameters for more information.
Note:
The Append tool modifies the input dataset permanently. Use the Enable Undo option to revert changes made by the tool.
- Click Run.
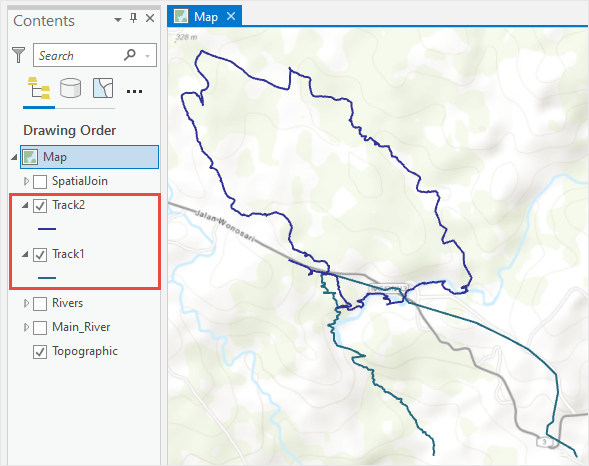
The image below shows Track1 appended to the target layer, Track2, in ArcGIS Pro.

The Merge tool
The Merge tool can be used to combine multiple datasets into a new dataset. The input dataset can be feature classes or tables. However, the input feature classes must be of the same geometry type. For example, a line feature class cannot be merged with a polygon feature class.
In this example, the Track1 and Track2 line feature layers are merged into a new layer in ArcGIS Pro.
- Open the ArcGIS Pro project.
- In the Geoprocessing pane, search for and click the Merge tool. Refer to ArcGIS Pro: Run a tool in the Geoprocessing pane for steps to do this.
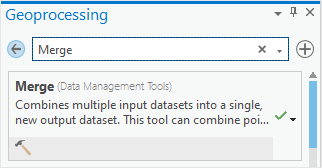
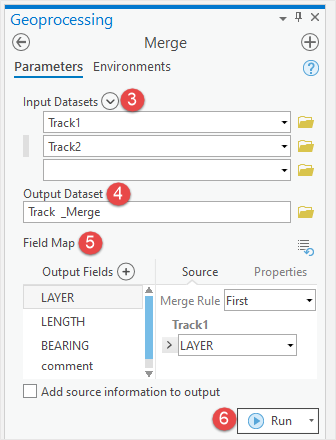
- In the Merge pane, under the Parameters tab, select the layers to merge from the Input Datasets drop-down list. In this example, Track1 and Track2 are selected.
- Provide a name for Output Dataset, and click Browse....
 to specify the location of the output dataset.
 - The Field Map parameter is optional, where all fields from the input datasets are included by default. Refer to ArcGIS Pro: Attribute field mapping for more information.
- Click Run.
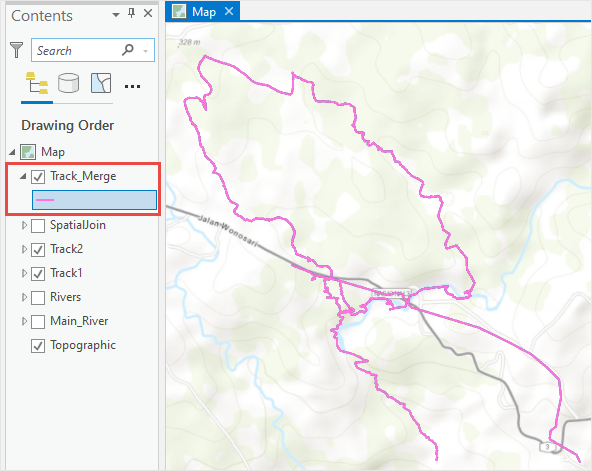
The image below shows the Track1 and Track2 layers merged into the new layer, Track_Merge, in ArcGIS Pro.
The Spatial Join tool
The Spatial Join tool is used to join attributes by matching rows from the join feature to the target feature based on the spatial relationship where a new feature class containing the attributes is created.
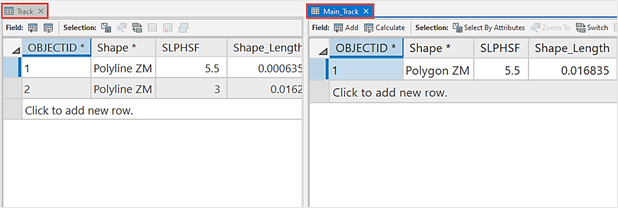
In this example, attributes of the Track and Main_Track layers are joined using the Spatial Join tool in ArcGIS Pro.
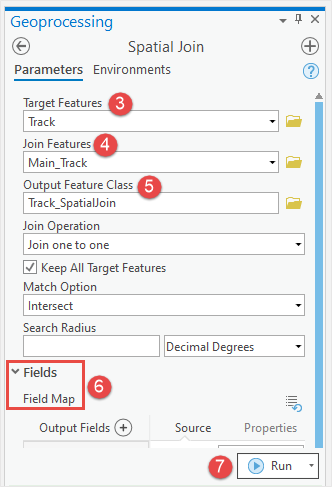
- Open the ArcGIS Pro project.
- In the Geoprocessing pane, search for and click the Spatial Join tool. Refer to ArcGIS Pro: Run a tool in the Geoprocessing pane for steps to do this.

- In the Spatial Join pane, under the Parameters tab, select the target layer from the Target Features drop-down list. In this example, Track is selected.
- Select the layer to join to the target layer from the Join Features drop-down list. In this example, Main_Track is selected.
- Provide a name for Output Feature Class, and click Browse....
 to specify the location of the output feature class.
 - Under the Fields node, the Field Map parameter is optional where all fields from the features are included by default. Refer to ArcGIS Pro: Attribute field mapping for more information.
- Click Run.
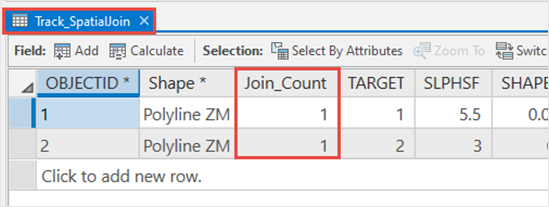
The image below shows the attribute, Track_SpatialJoin, joined from the Track and Main_Track attributes in ArcGIS Pro.
Article ID: 000025415
- ArcGIS Pro 2 8 x
- ArcGIS Pro 2 7 x
- ArcGIS Pro 2 x
Get support with AI
Resolve your issue quickly with the Esri Support AI Chatbot.


Related Information
Discover more on this topic
Search for related information
Find training related to this topic
Explore ideas and give feedback
Get help from ArcGIS experts
Start chatting now