Frequently asked question
Is it possible to undo an append operation performed on a feature layer in ArcGIS Online?
No. In ArcGIS Online, it is not possible to undo an append operation performed on a feature layer. However, as a workaround, it is possible to edit the ArcGIS Online feature layer in ArcGIS Pro to remove the appended data. The workflow below involves downloading the .pitemx file from ArcGIS Online and editing the attribute table of the feature layer in ArcGIS Pro.
Note:
In ArcGIS Pro, the option to undo an append operation is available when running the Append tool with the Enable Undo option enabled. Refer to ArcGIS Pro: Undo geoprocessing tools for more information.
- In ArcGIS Online, navigate to Content > My Content, and click the feature layer to access the item details page.
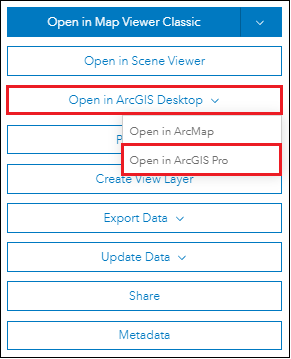
- On the item details page, click Open in ArcGIS Desktop > Open in ArcGIS Pro.
- Save the .pitemx file to the computer, and click the file to launch it in ArcGIS Pro.
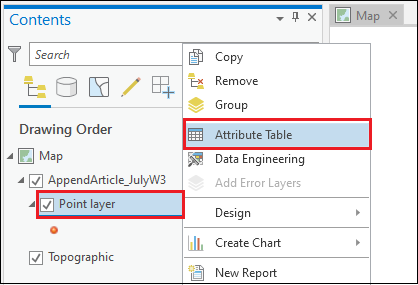
- In ArcGIS Pro, in the Contents pane, right-click the feature layer, and select Attribute Table.
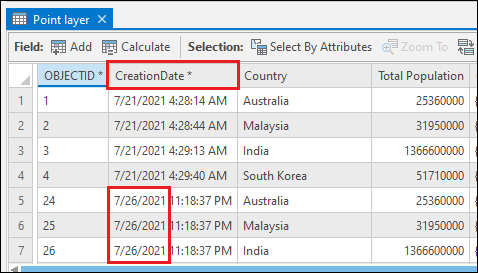
- In the table view, identify the date and time of the append operation from the data of the CreationDate field. In this example, the last known date before the append operation is '7/21/2021', while the append operation occurs on '7/26/2021'.
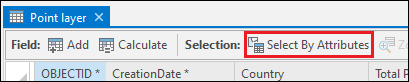
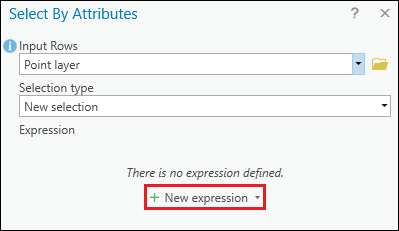
- Click Select By Attributes.
- In the Select By Attributes window, click New expression to open the query builder.
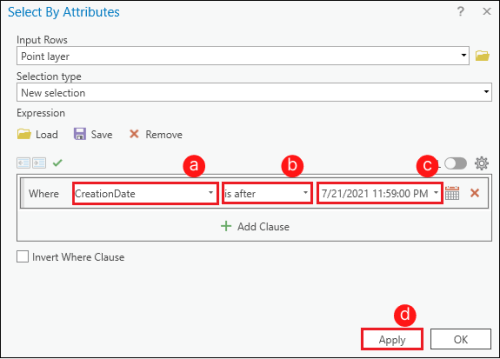
- Fill in the three preformatted boxes in the query builder.
- In the first box, click the drop-down arrow, and select CreationDate.
- In the second box, click the drop-down arrow, and select is after.
- In the third box, insert a date and time before the append operation is performed. In this example, '7/21/2021 11:59:00 PM' is entered in the query as the append operation occurs after this date.
- Click Apply. The appended data is selected.
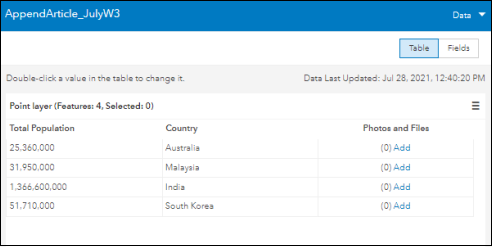
- In the table view, click Delete to delete the features selected. The appended data is now deleted.

- On the ArcGIS Pro ribbon, click the Edit tab. In the Manage Edits group, click Save.

The appended data is now removed from the feature layer in ArcGIS Online.
Article ID: 000025661
- ArcGIS Online
Get support with AI
Resolve your issue quickly with the Esri Support AI Chatbot.


Related Information
Discover more on this topic
Search for related information
Find training related to this topic
Explore ideas and give feedback
Get help from ArcGIS experts
Start chatting now