HOW TO
Connect an Add-In to ArcGIS Pro
Summary
This article describes the steps to install and connect an Add-In (.esriAddInX) to ArcGIS Pro, which can be downloaded from the following sites:
Procedure
The ArcGIS Solution Deployment Add-In (esriAddInX) is used for the example.
Install the Add-In
- Browse to the folder where the Add-In was extracted
- Is recommended to always use the same folder for all Add-Ins
- By default, a copy of all the Add-Ins installed are saved in C:\Users\<username>\Documents\ArcGIS\AddIns\ArcGISPro
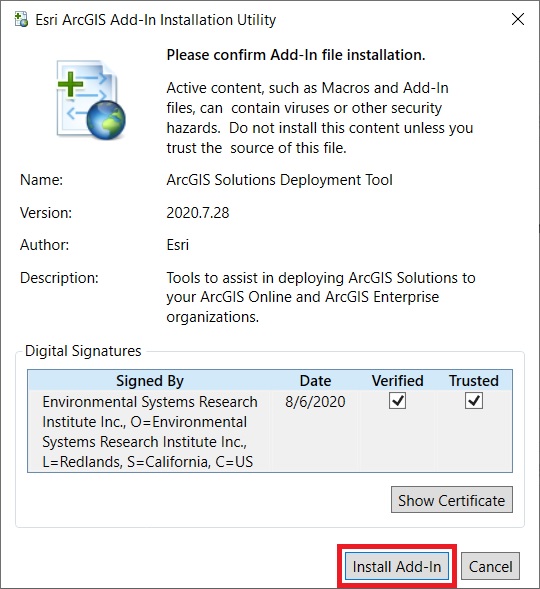
- Double-click the .esriAddInX file to launch the Esri ArcGIS Add-In Installation Utility.
- Click Install Add-In.
Connect the Add-In to ArcGIS Pro
- Launch ArcGIS Pro.
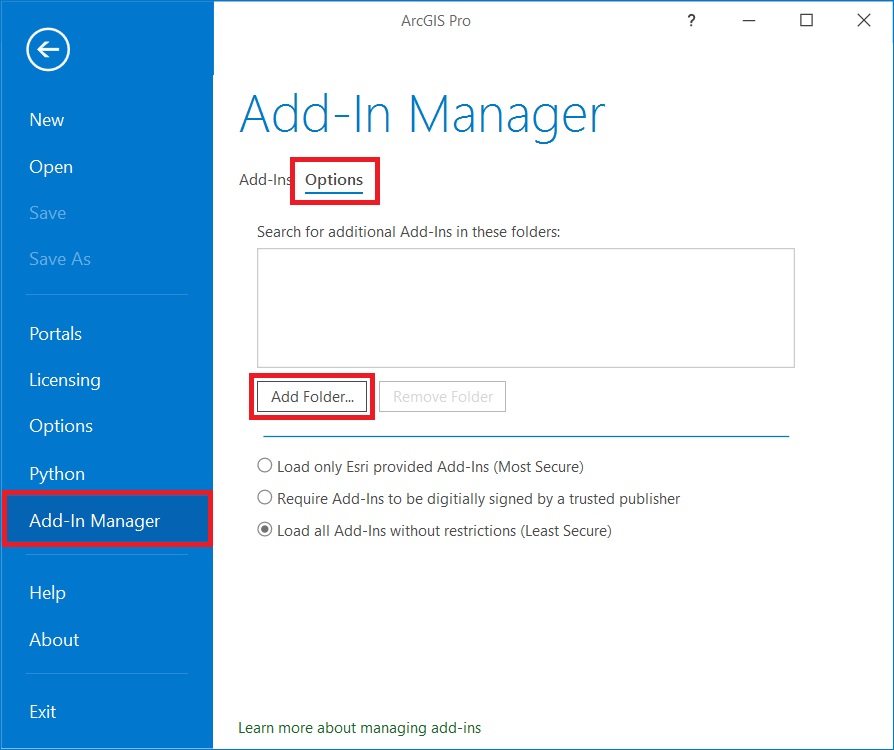
- Go to Settings > Add-In Manager.
- On the Options tab, click Add Folder.
- Browse to the folder where the Add-In previously installed is hosted.
- Re-open ArcGIS Pro to apply the changes.
Article ID: 000026259
Software:
- ArcGIS Pro 2 8 x
- ArcGIS Pro 2 7 x
- ArcGIS Pro 1 x
- ArcGIS Pro 2 x
Get support with AI
Resolve your issue quickly with the Esri Support AI Chatbot.


Related Information
Discover more on this topic
Search for related information
Find training related to this topic
Explore ideas and give feedback
Get help from ArcGIS experts
Start chatting now