HOW TO
Exportieren einer Feature-Class in eine Feature-Class oder eines Shapefiles in ein anderes Koordinatensystem
Zusammenfassung
Exporting data allows sharing of data with other users across multiple platforms. In ArcGIS Pro, it is possible to export feature classes to feature classes or shapefiles in a desired coordinate system. This article outlines four methods to do so. These methods include using one of the following analysis tools:
- The Project tool
- The Export Features tool
- The Feature Class To Feature Class tool
- The Feature Class To Shapefile tool
For more information about these tools, see the Related Information section below.
Vorgehensweise
In these examples, the output coordinate system is NAD 1983 HARN StatePlane Washington North FIPS 4601 (US Feet).
Export the feature class to feature class using the Project tool
- Open the ArcGIS Pro project.
- On the top ribbon, click the Analysis tab > Tools.
- In the Geoprocessing pane, search for and click Project (Data Management Tools). The Project window opens.
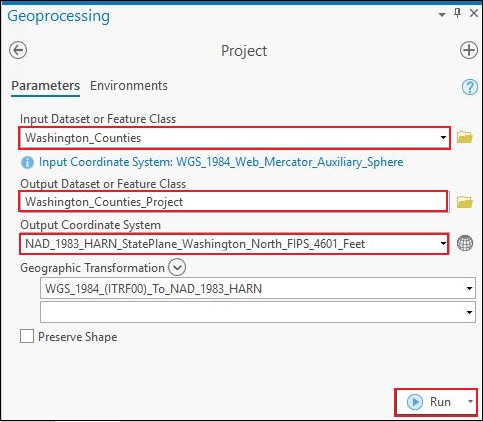
- In the Project window, click Parameters.
- Click the drop-down menu of Input Dataset or Feature Class, and select the desired feature layer. In this example, the layer is Washington_Counties.
- For Output Dataset or Feature Class, specify a name for the output layer and its location. In this example, the output name is Washington_Counties_Project.
- For Output Coordinate System, select a desired coordinate system. In this example, NAD 1983 HARN StatePlane Washington North FIPS 4601 (US Feet) under Projected Coordinate System in the Coordinate System window is selected.
- Click Run.
Export the feature class to feature class using the Export Features tool
- Open the ArcGIS Pro project.
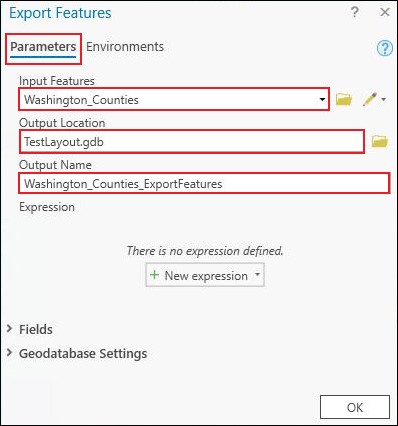
- On the Contents pane, right-click the desired feature layer. Click Data > Export Features. The Export Features window opens.
- In the Export Features window, under Parameters, for the Output Name section, specify the output name. The Input Features and Output Location parameters are populated automatically.
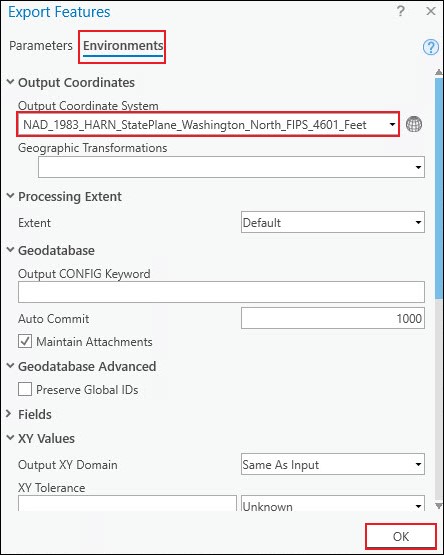
- In the Export Features window, click Environments.
- For Output Coordinate System, select a desired coordinate system. In this example, NAD 1983 HARN StatePlane Washington North FIPS 4601 (US Feet) under Projected Coordinate System in the Coordinate System window is selected.
- Leave other parameters at default.
- Click OK.
Export the feature class using the Feature Class To Feature Class tool
- Open the ArcGIS Pro project.
- On the top ribbon, click the Analysis tab, and click Tools.
- In the Geoprocessing pane, search for and click Feature Class To Feature Class (Conversion Tools). The Feature Class To Feature Class window opens.
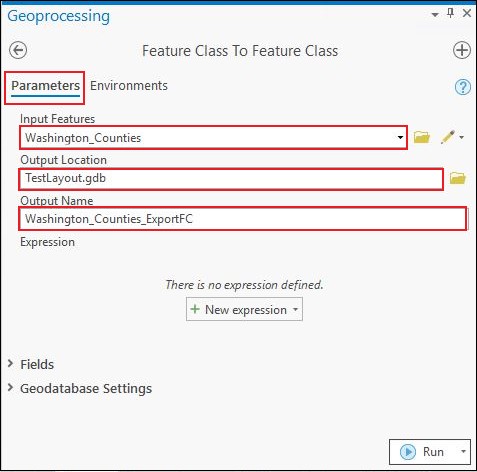
- In the Feature Class To Feature Class window, click Parameters.
- For Input Features, select the desired layer. In this example, the layer is Washington_Counties.
- For Output Location, specify the geodatabase location of the layer.
- For Output Name, specify a name for the output feature class. In this example, the output name is Washington_Counties_ExportFC.
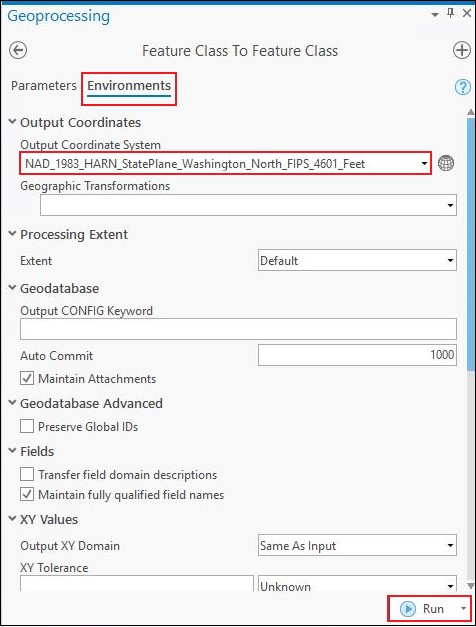
- In the Feature Class To Feature Class window, click Environments.
- For Output Coordinate System, select a desired coordinate system. In this example, NAD 1983 HARN StatePlane Washington North FIPS 4601 (US Feet) under Projected Coordinate System in the Coordinate System window is selected.
- Leave other parameters at default.
- Click Run.
Export the feature class to shapefile using the Feature Class To Shapefile tool
- Open the ArcGIS Pro project.
- On the top ribbon, click the Analysis tab, and click Tools.
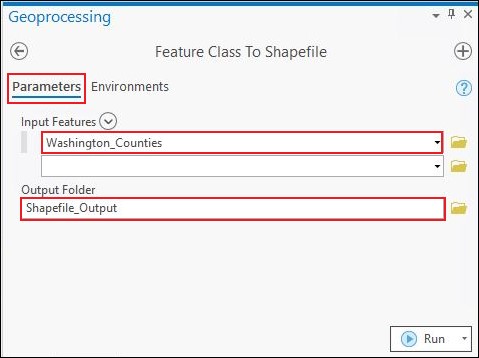
- In the Geoprocessing pane, search for and click Feature Class To Shapefile (Conversion Tools).
- For Input Features, select the desired layer. In this example, the layer is Washington_Counties.
- For Output Folder, specify the folder location for the shapefile. In this example, the folder is Shapefile_Output.
- In the Feature Class To Shapefile window, click Environments.
- For Output Coordinate System, select a desired coordinate system. In this example, NAD 1983 HARN StatePlane Washington North FIPS 4601 (US Feet) under Projected Coordinate System in the Coordinate System window is selected.
- Leave other parameters at default.
- Click Run.

Artikel-ID: 000026350
Holen Sie sich Unterstützung mit KI
Lösen Sie Ihr Problem schnell mit dem Esri Support AI Chatbot.


Zugehörige Informationen
Weitere Informationen zu diesem Thema erkunden
Search for related information
Find training related to this topic
Explore ideas and give feedback
Unterstützung durch ArcGIS-Experten anfordern
Beginnen Sie jetzt mit dem Chatten