HOW TO
Kopieren einer Symbolisierung und Anwenden dieser Symbolisierung auf einen anderen Feature-Layer in ArcGIS Online
Zusammenfassung
In some cases, when importing hosted feature layers published from ArcGIS Pro from another project in ArcGIS Online, the symbology is not preserved. This article highlights the workflow to transfer symbology from a hosted feature layer published from ArcGIS Pro to another layer in the admin REST endpoint in ArcGIS Online by copying its JSON script.
Vorgehensweise
Note:
This workflow works with hosted feature layer published from ArcGIS Pro. Symbology definition edited from ArcGIS REST Services Directory for layers added within ArcGIS Online is not honored and is reverted back to the default JSON definition.
- Copy the JSON script of the symbology.
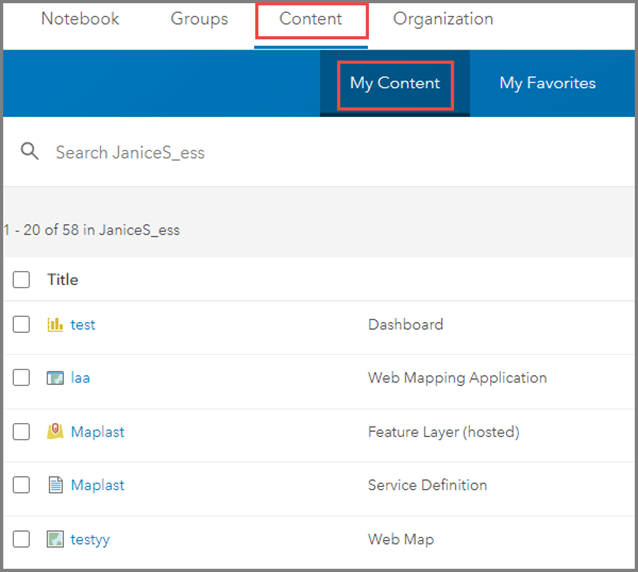
- In ArcGIS Online, navigate to Content > My Content.
- On the My Content tab, select the item to open its item details page.
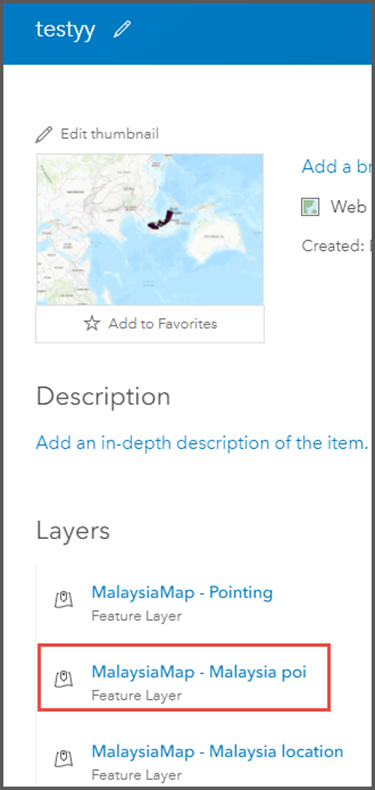
- On the item details page, select and click the feature layer containing the symbology.
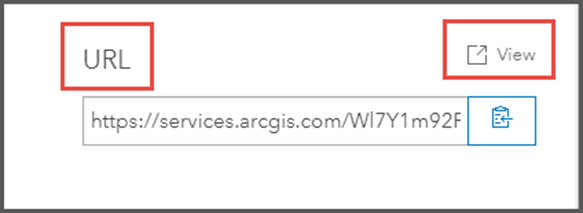
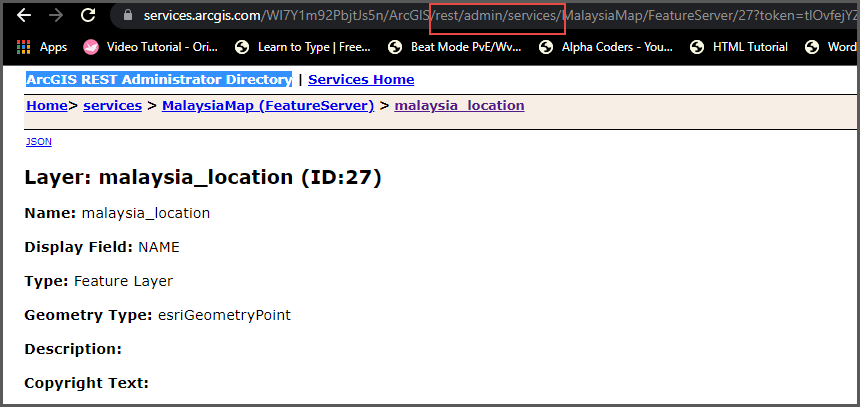
- Scroll down to the URL section and click View. The page redirects to ArcGIS REST Services Directory.
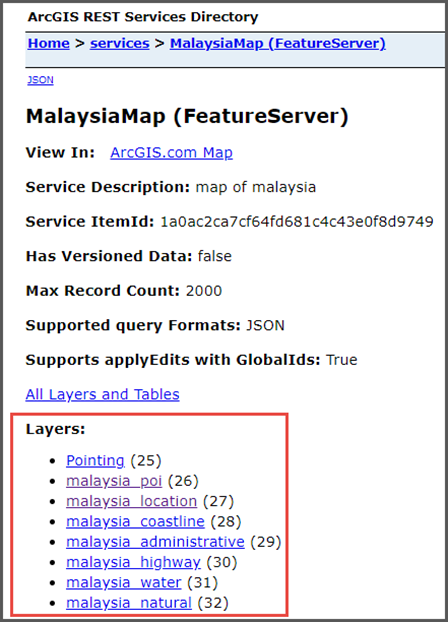
- On the ArcGIS REST Services Directory page, under Layers, select and click the layer with the desired symbology. This article uses malaysia_poi as an example.
- Navigate to the Drawing Info section and copy the JSON script.

- Transfer the copied JSON script to another layer.
- Repeat Steps 1c through 1f. In Step 1f, select the desired layer. This example uses malaysia_location.
Note:
To edit the JSON script, access the ArcGIS REST Administrator Directory.
- On the ArcGIS REST Services Directory page, in the browser address bar, replace ‘/rest/services/’ with ‘/rest/admin/services/’. Reload the page.
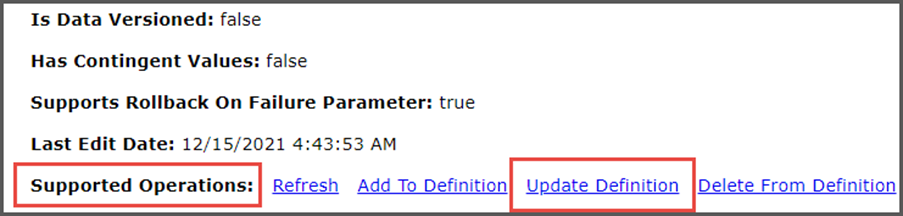
- Scroll down the page, under Supported Operations, click Update Definition.
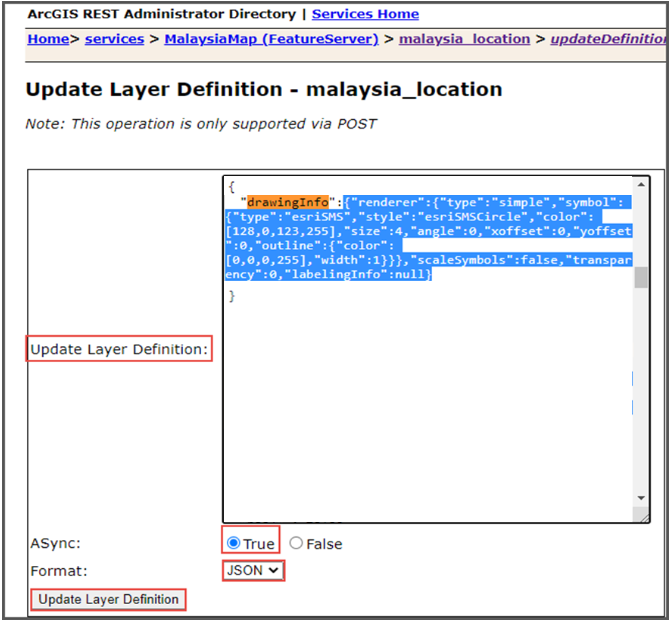
- In the Update Layer Definition box, clear out the existing content. Add an opening curly bracket { in the first line, in the next line, type "drawingInfo":{ , then paste the JSON script from the first layer and add a closing curly bracket at the end } (similar to the format shown in the example and screenshot below).
{
    "drawingInfo":{"renderer":{"type":"simple","symbol":
{"type":"esriSMS","style":"esriSMScircle","color":
[128,0,123,255],"size":4,"angle":0,"xoffset":0,"yoffset":0,"outline":"{"color":
[0,0,0,255],"width":1}}},"scaleSymbols":false,"transparency":0,"labelingInfo":null}
}
- Select True for ASync and select JSON for Format. Click Update Layer Definition.
Note:
If the schema of your layers do not match, for example if the second layer is missing a field or a domain that is used in the symbology (i.e. referenced in the drawing info), updating layer definition may still return success but the symbology of the layer won't change.
Artikel-ID: 000027205
Holen Sie sich Unterstützung mit KI
Lösen Sie Ihr Problem schnell mit dem Esri Support AI Chatbot.


Zugehörige Informationen
Weitere Informationen zu diesem Thema erkunden
Search for related information
Find training related to this topic
Explore ideas and give feedback
Unterstützung durch ArcGIS-Experten anfordern
Beginnen Sie jetzt mit dem Chatten