HOW TO
Perform offline deauthorization of licenses for ArcGIS Desktop and ArcGIS Engine
Summary
To make ArcGIS Desktop and ArcGIS Engine licenses available for use on other machines, it is necessary to deauthorize them.
Note:
Deauthorizing licenses using the offline method can be done without the client machine requiring direct access to the internet, which is useful for machines without such access, or where the online method fails.
Procedure
Deauthorizing concurrent-use and single-use licenses uses essentially the same workflow. The main difference is where the Software Authorization Wizard is accessed, which is used to perform the deauthorization. Concurrent-use licenses use the Esri License Manager, whereas single-use licenses can be managed via the ArcGIS Administrator program.
Note:
If the machine on which the software was originally installed has crashed, been lost, or is otherwise unavailable, please see the following article: How To: Recover lost licenses from My Esri.
For concurrent-use licenses
- Open the License Manager and select Authorization from the panel on the left.
- Click Deauthorize to launch the Software Authorization Wizard.

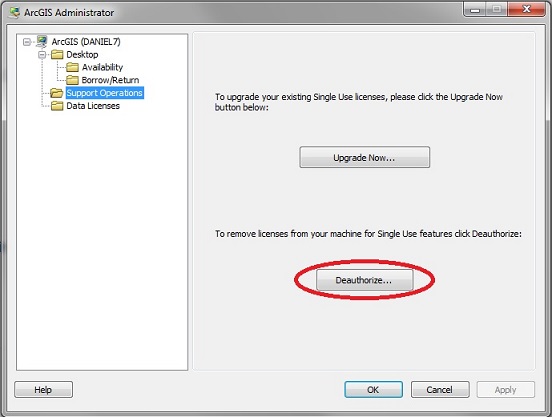
For single-use licenses
- Open ArcGIS Administrator and select Support Operations from the panel on the left.
- Start > All Programs > ArcGIS > ArcGIS Administrator.
- Click Deauthorize to launch the Software Authorization Wizard.
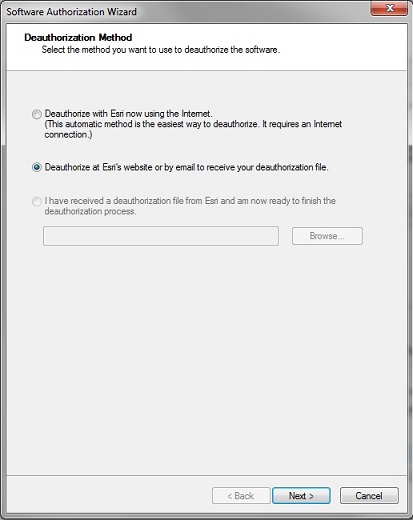
- Under Deauthorization Method, select the second option, Deauthorize at Esri's website or by email to receive your deauthorization file.
- Under Deauthorization Options, select the features to deauthorize.
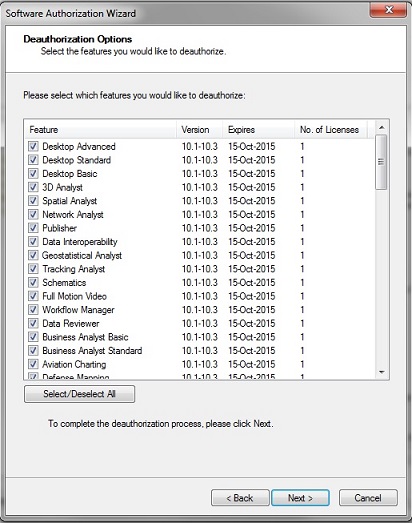
Note:
When deauthorizing concurrent-use licenses, the quantity of each license to remove can be changed by entering the appropriate value under the 'No. of Licenses' column.
- Under Email Deauthorization, click Save to save the deauthorize.txt file that is used to complete the process.
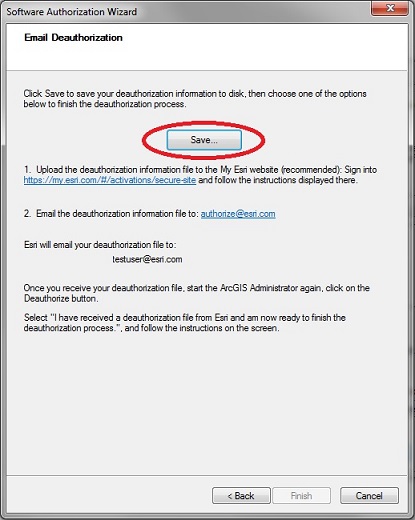
- To send the deauthorization file via email:
- Send an email to authorize@esri.com, with the file as an attachment. Save the RESPS file that is emailed back.
- Log into my.esri.com and under My Organizations select Licensing, and Additional Licensing Tools.
- Click Secure Site Operations and click Browse to select the deauthorization file.
- Click Upload.
- Save the resulting RESPS file and move it to the original machine.
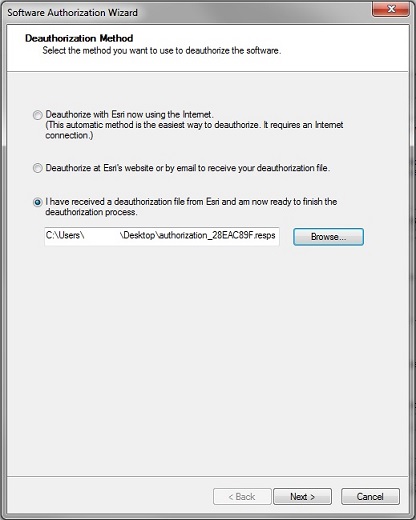
- Repeat Step 1 to open the Software Authorization Wizard. Select the third option, I have received a deauthorization file from Esri and am now ready to finish the deauthorization process.
- Click Browse and select the RESPS file created in the last step.
- Click Next to complete the deauthorization process.
Note:
Although the licenses are immediately available for use, this availability may take some time to be correctly displayed on my.esri.com.  If the license(s) still show as authorized or as disabled in ArcGIS Administrator, navigate to "C:\ProgramData\FLEXnet" and rename the FLEXnet folder to FLEXnet old.  Reboot the system.
Article ID:000012537
- ArcMap
- ArcGIS Engine
Get help from ArcGIS experts
Download the Esri Support App
Related Information
Discover more on this topic
Search for related information
Find training related to this topic
Explore ideas and give feedback