CÓMO
Convertir un ráster de tipo flotante a una clase de entidad poligonal y conservar los valores decimales
Resumen
The Raster to Polygon tool can only process integer input rasters. Therefore, a floating type raster must be converted to an integer type raster before using the tool.
Procedimiento
Note:
The following workflow requires a Spatial Analyst license. The Int tool mentioned in this article exists in both the Spatial Analyst and 3D Analyst toolsets.
The instructions provided describe how to convert a floating type raster to a polygon feature class and retain the decimal values.
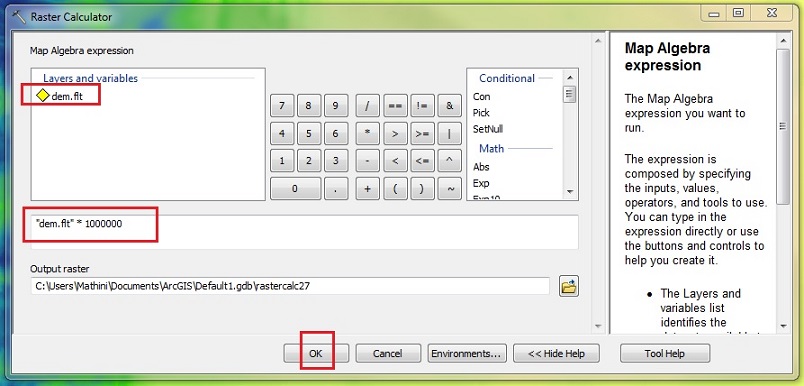
- Using the Raster Calculator tool, multiply the raster by 10 to remove the decimal values. For example, multiply a raster by 1000 if the raster values contain three decimal places, and by 100 if the values contain two decimal places.
- Navigate to ArcToolbox > Spatial Analyst Tools > Map Algebra > Raster Calculator.
- In the Layers and variables section, double-click the raster.
- Click the multiplication sign (*).
- Input the required multiple of 10. In this example, 1000000 is used because the raster contains floating values with six decimal places.
- Click OK.
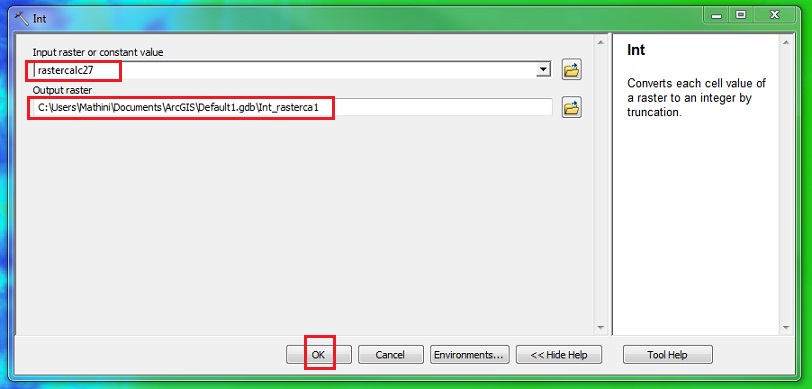
- Using the Int tool, convert the floating type raster to an integer type raster.
- Navigate to ArcToolbox > Spatial Analyst Tools > Math > Int.
- In the Int window, specify the raster created in Step 1 in the Input raster or constant value field.
- Specify the name and location for the output raster.
- Click OK.
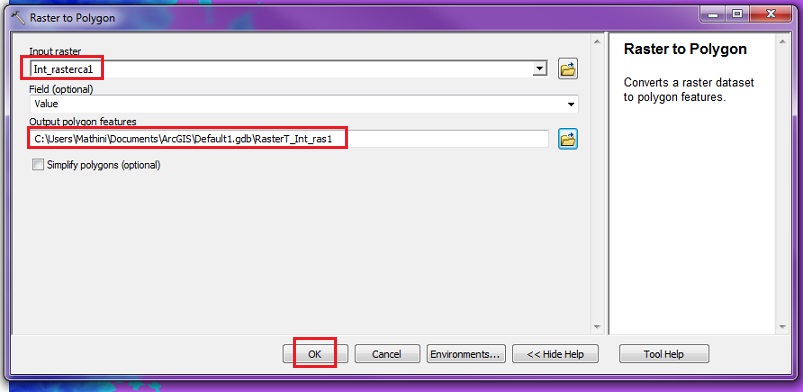
- Convert the integer type raster to a polygon feature class using the Raster to Polygon tool.
- Navigate to ArcToolbox > Conversion Tools > From Raster > Raster to Polygon.
- In the Raster to Polygon window, specify the raster created in Step 2 in the Input raster field.
- Specify the name and location for the output polygon feature class.
- Fill in any optional parameters.
- Click OK.
- Divide the polygon feature class by 10, as used in Step 1, to get the original decimal values.
- Right-click the output feature layer from Step 3 and click Open Attribute Table.
- Click the Table Options drop-down arrow and click Add Field.
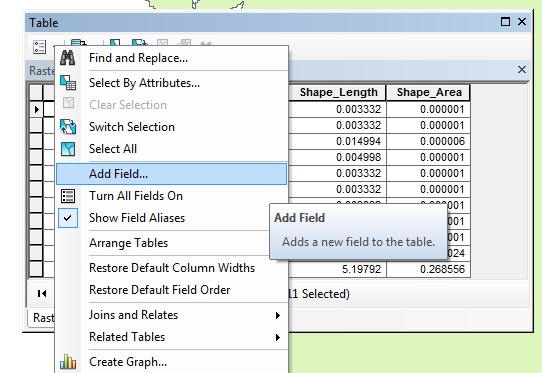
- Fill in the parameters in the Add Field window and click OK.

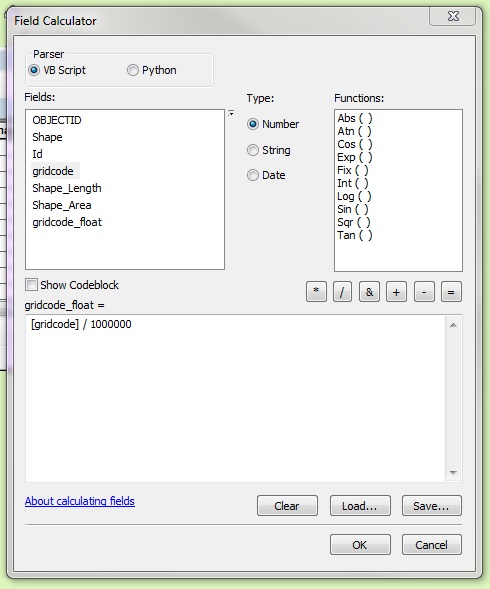
- Right-click the heading of the new field and click Field Calculator.
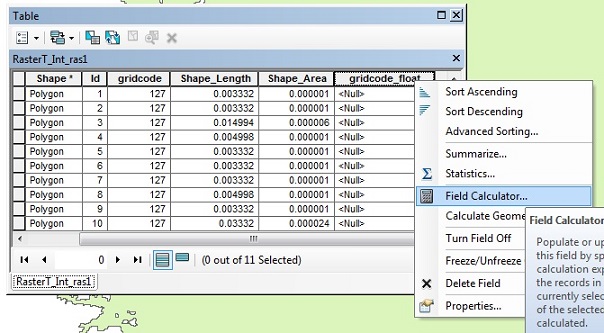
- In the Fields section, double-click the gridcode field with the multiple of 10 used in Step 1 and click OK.
Id. de artículo:000012554
Obtener ayuda de expertos en ArcGIS
Descargar la aplicación de soporte de Esri
Información relacionada
Descubrir más sobre este tema
Search for related information
Find training related to this topic
Explore ideas and give feedback