HOW TO
Change symbology for point data based on a date field within an attribute table
Summary
When intending to change the color, size, or shape of a point feature layer based on dates within the attribute table, a tracking layer must be configured using the ArcGIS Tracking Analyst extension.
Note:
Tracking Analyst allows the symbolization of temporal data using time windows and other specialized options for viewing data that changes through time.
Procedure
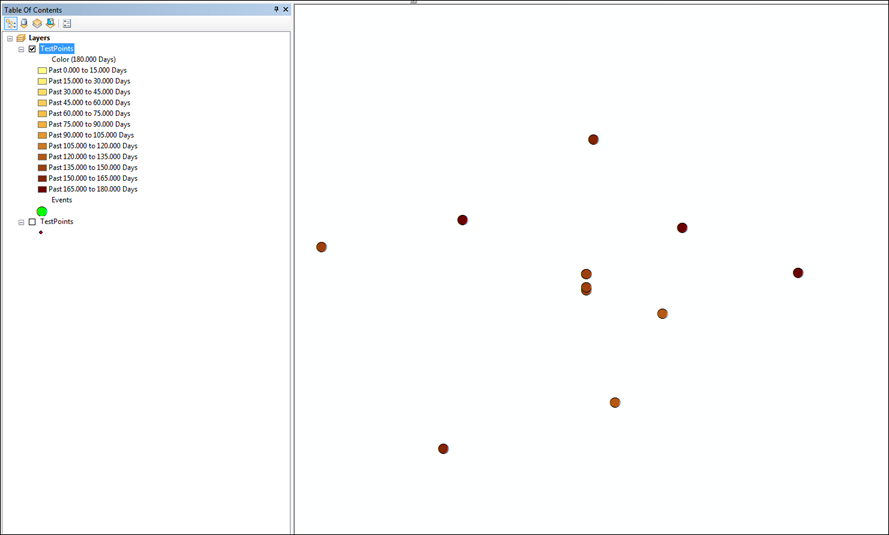
The instructions provided describe how to configure a tracking layer that updates the color of the symbology, based on a date field in the feature class' attribute table. In this example, the field contains system-formatted dates.- Create a feature class that contains a date field. For more details, refer to the following help page: About creating feature classes.
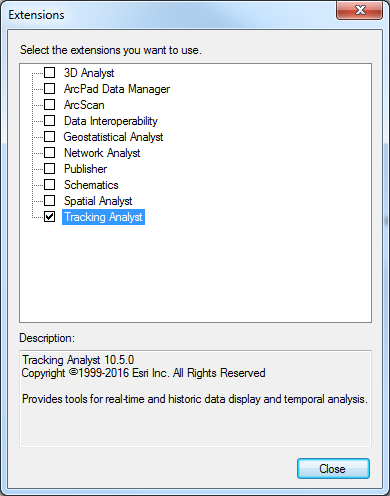
- Enable the Tracking Analyst extension by navigating to Customize > Extensions, and check the check box next to Tracking Analyst.
- Add the Tracking Analyst toolbar to ArcMap by navigating to Customize > Toolbars > Tracking Analyst.
- In an editing session, create data to populate the date field. For more information, refer to the following help page: Fundamentals of date fields.
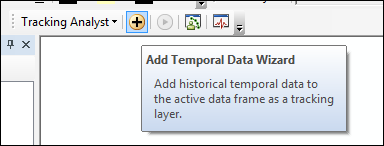
- Click the Add Temporal Data button on the Tracking Analyst toolbar to open the Add Temporal Data Wizard dialog box.
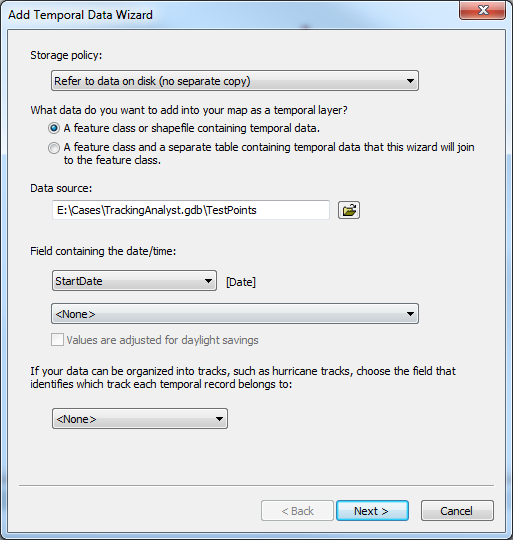
- For Storage policy:, select Refer to data on disk (no separate copy).
- Specify the data source as the feature class created in Step 1 that contains the now populated date field.
- Ensure that Field containing the date/time: is selected correctly, based on the written format of the date.
- Click Next > Finish. This creates the tracking event layer.
- Double-click the tracking event layer to open the Layer Properties dialog box.
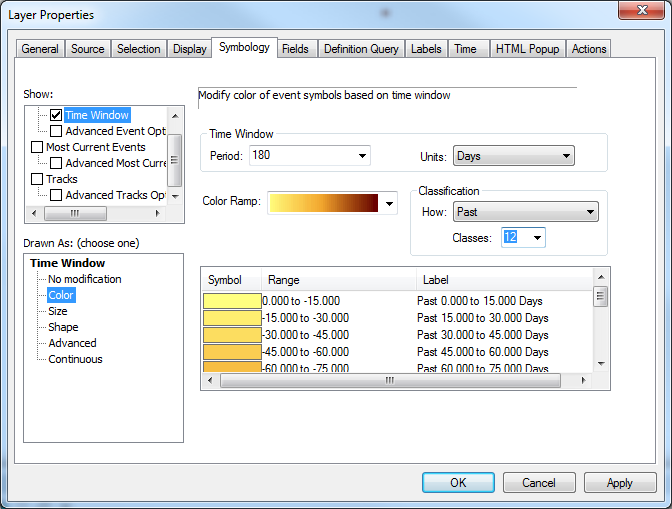
- Go to the Symbology tab.
- Under Events in the Show: panel, check the check box next to Time Window.
- Specify the desired Time Window.
- In the Drawn As: (choose one) panel, select Color.
- Specify the desired number of classes using the Past option.
- Set the range by starting at the highest number and enter the desired range, and continue down to the lowest class.
- Click OK.
- Save the map document. At this point, changes made to the feature class created in Step 1 are reflected in the map document with the tracking layer when it is opened.
Article ID:000014524
Software:
- ArcMap
Get help from ArcGIS experts
Download the Esri Support App
Related Information
Discover more on this topic
Search for related information
Find training related to this topic
Explore ideas and give feedback