HOW TO
Attach the same file to all features simultaneously
Summary
There is a way to attach the same file to all the features in the dataset in ArcMap without having to search for the file feature-by-feature, or attach the file to each feature individually. This is especially useful if the project involves thousands of features.
The following workflow describes how to attach one file to all features within a feature class. This includes PDFs and images, however this tutorial shows an example with a .jpg. The workflow does not change between file types.
Procedure
Note:
As a best practice, place all data such as the map document, geodatabase, and attachment files in one folder. In this folder, create another separate folder to store the desired file to be attached. This is required for the following workflow.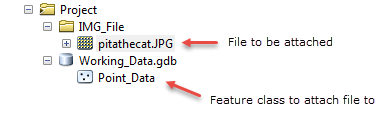
- Prepare the feature class for attachments.
- Open the map document containing the feature class for the adding of attachments.
- Ensure the file does not currently have attachments enabled. If the attachments are enabled, disable the attachments within the Catalog window by right-clicking the feature class > Manage > Delete Attachments.
- Load the feature class in the map.
- Open the attribute table of the feature class by right-clicking the layer in the Table Of Contents > Open Attribute Table.
- Add a new Text field to the attribute table with the same name as the file the user wants to add as an attachment. (For example, if the file name is "little_pug.jpg", the field header is named as "little_pug".)

- Start an edit session on the feature class.
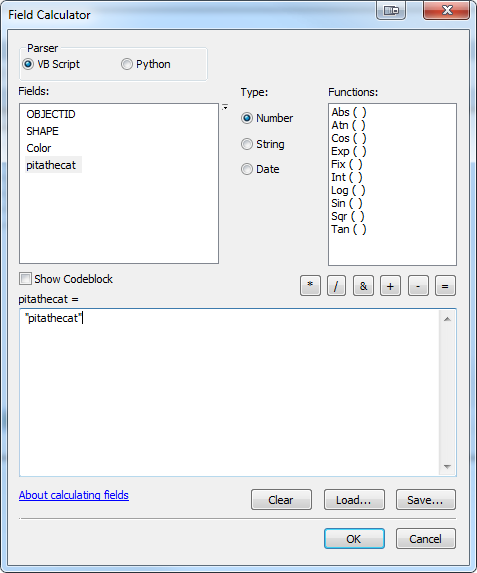
- Run the Field Calculator on the new field created in (Step e).
- In the Field Calculator dialog box, ensure the VB Script button is selected as Parser.
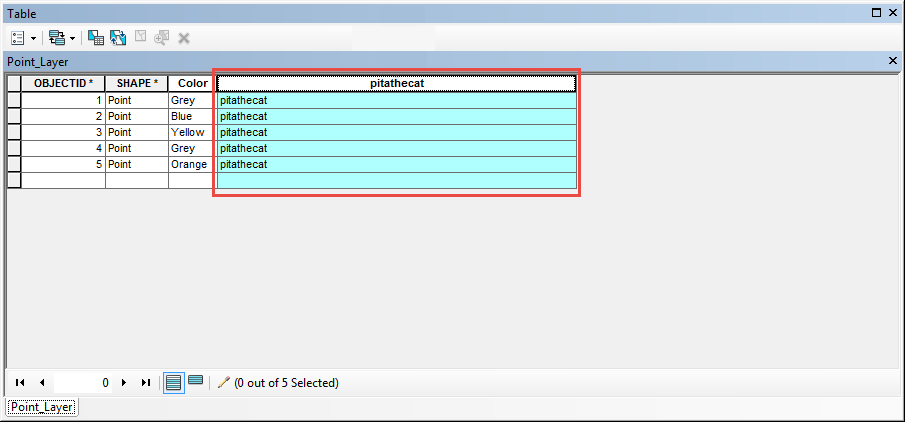
- Type the name of the column header enclosed in double quotes. The column header in the field and each attribute within the field must share the exact same name as the file the user wants to attach.
- Save the edits.
- Create and prepare the attachment match table.
- In the Catalog window, right-click the feature class > Manage > Create Attachments. This creates an attachment table and relationship.
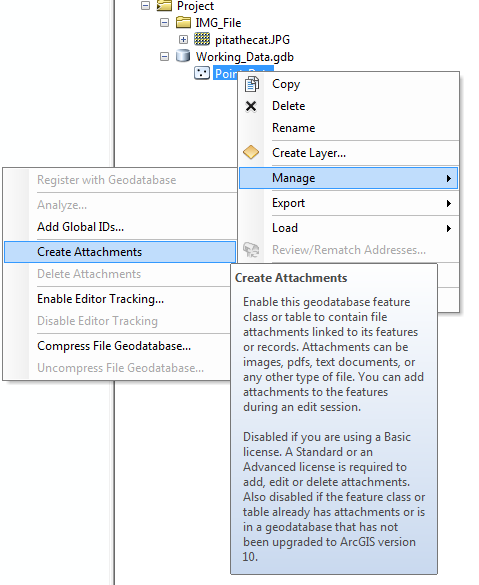
Note:
The attachment table is not used in this workflow, therefore it is safe to ignore the table.
- Open the Generate Attachment Match Table tool.
- Select the layer for Input Dataset.
- Set the folder where the attachment file is located as Input Folder.
- Select the field created in Step 1(e) for Key Field.
- Save the table in the same geodatabase where the feature class is located.
- Uncheck the Store Relative Path check box, and click OK.
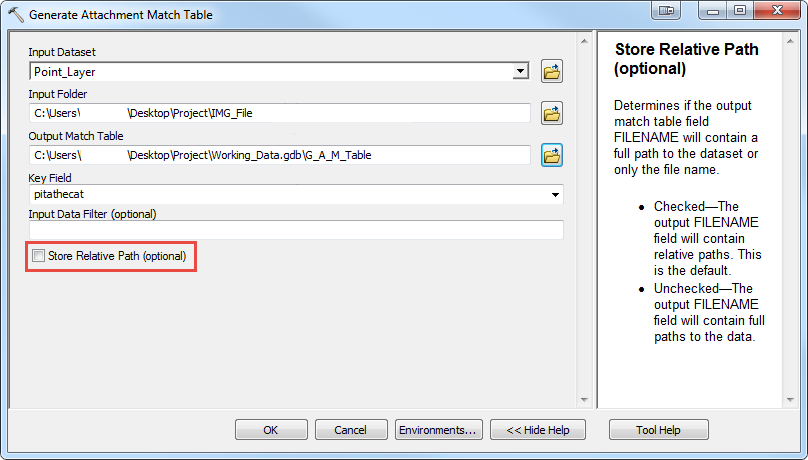
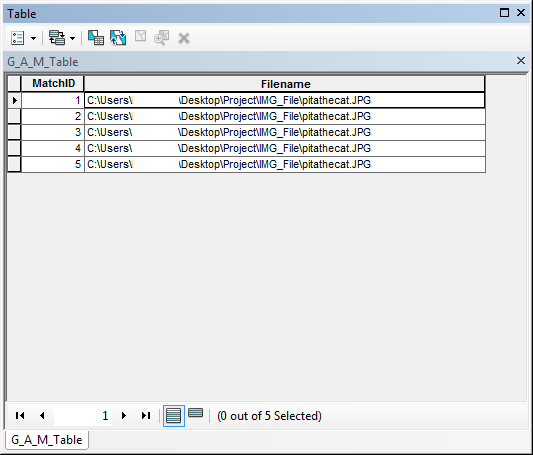
A table containing two fields; MatchID and Filename, is created. The path to the attachment file is under the Filename field for each feature.
- In the Catalog window, right-click the feature class > Manage > Create Attachments. This creates an attachment table and relationship.
- Add the attachments using the Add Attachment tool.
- In the Catalog window, navigate to Data Management Tools > Attachments > Add Attachments.
- Select a layer for Input Dataset.
- Select OBJECTID for Input Join Field.
- Select a layer for Match Table.
- Select MatchID for Match Join Field.
- Select Filename for Match Path Field, and click OK.
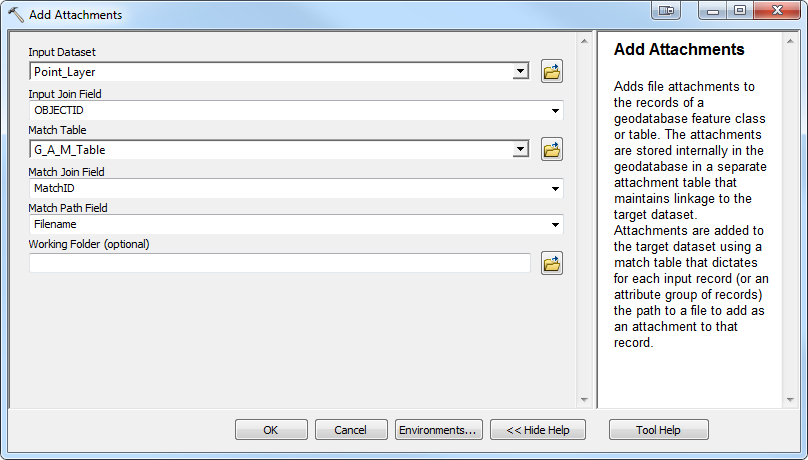
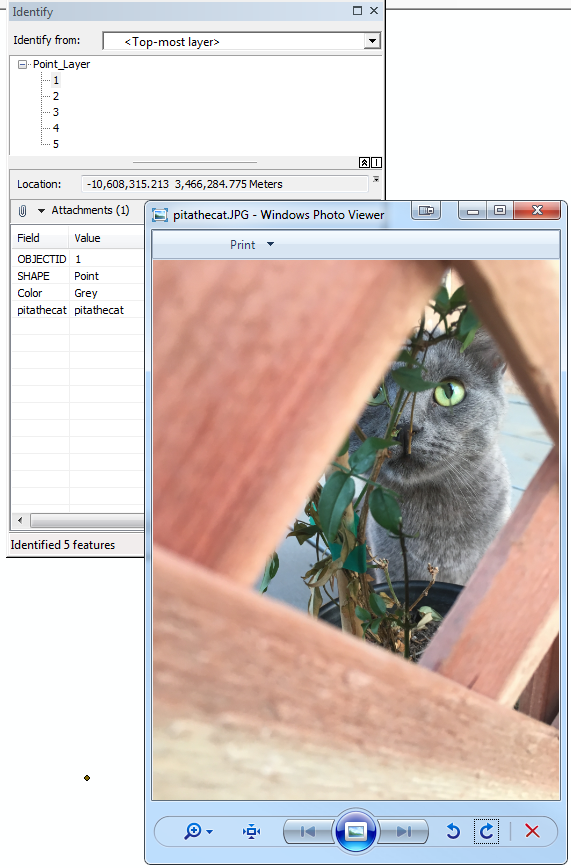
The same file is added to each feature and attached to every attributes in the feature class.
Article ID:000013909
- ArcMap
Get help from ArcGIS experts
Download the Esri Support App
Discover more on this topic
Search for related information
Find training related to this topic
Explore ideas and give feedback