HOW TO
Create equally spaced transects perpendicular to a line feature in ArcMap
Summary
Creating equally spaced transects is important to derive the necessary information from lines running perpendicular to a main feature such as roads, pipelines, or rivers. For example, to study the distribution of amphibians along a coastal swamp, or to determine the water velocity along a river.
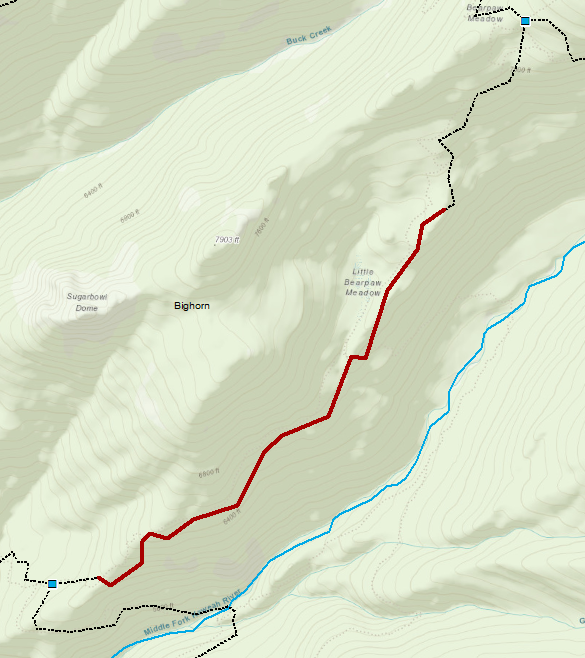
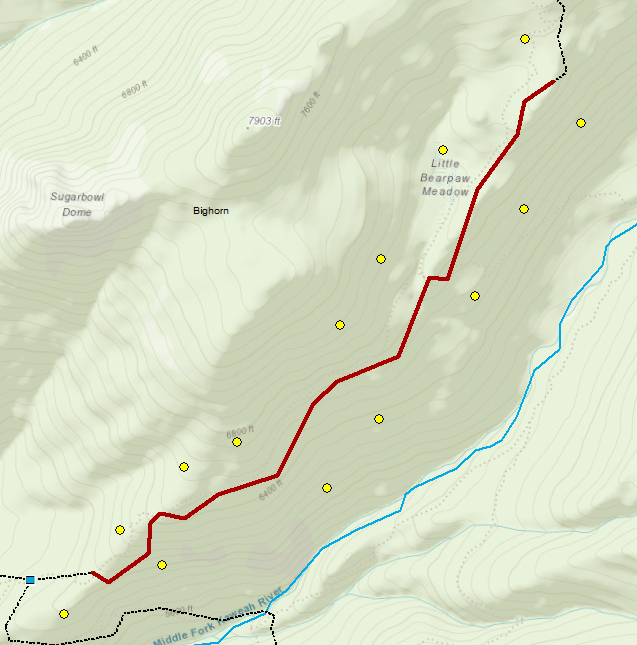
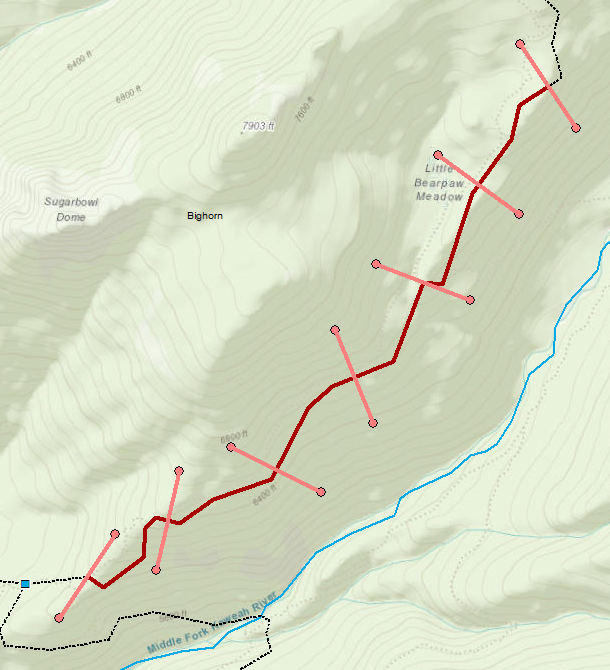
The image below shows a portion of a study area; a 3000-meter hiking trail in Sequoia National Park, California. In this article, the plant distribution surrounding this portion of the trail is studied based on the equally spaced transects created every 500 meters.
Procedure
This method uses ArcMap's linear referencing tools available with a basic license. The following steps describe how to create equally spaced transects perpendicular to a line feature in ArcMap:
- In ArcMap, create a route feature class. This is the main line feature. Equally spaced perpendicular transects are created along this line feature.
Note:
A route feature class is a line feature class containing the M-value and a route identifier field. In this example, the route identifier field is ROUTEID. Other common names are RID and ROUTE_ID. Refer to ArcMap: About creating route feature class or ArcMap: Setting the route identifier field for more information.

- Apply the route measure to define the M-value for each vertex of the route feature class.
- In an edit session, click the Edit Tool icon
 and double-click the route feature class. The vertices within the route feature class are displayed.
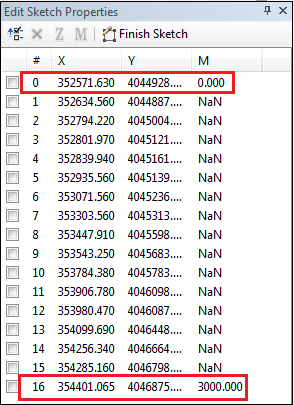
 - Click the Sketch Properties icon
 to open the Edit Sketch Properties window.
 - In the M column, define point 0 as 0.000, and the last point of the length is displayed in the SHAPE_Length column of the attribute table. In this example, the M-value of the last point (point 16) is defined as 3000.000.
- In an edit session, click the Edit Tool icon
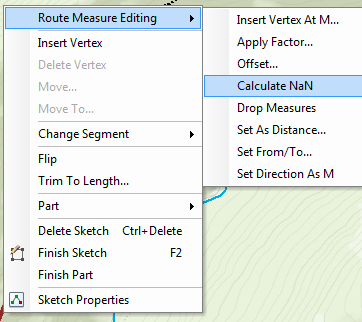
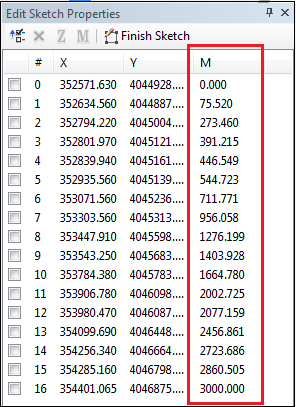
- Right-click the route feature class. Select Route Measure Editing > Calculate NaN. Save the edits.
- Create two point event tables each for the positive and negative offset points. The point event tables store information of perpendicular points along the route feature class. In this case, two point event tables are created as geodatabase tables.
- In Catalog, right-click the file geodatabase. Click New > Table. Name the table for the positive offset points Offset_Positive.
- Create three additional fields: a route identifier field, a location field to locate the position of perpendicular points along the route feature class, and the offset field to locate the deviation from the route feature class. Name each field ROUTEID, MEASURE_LOCATION, and OFFSET, respectively.
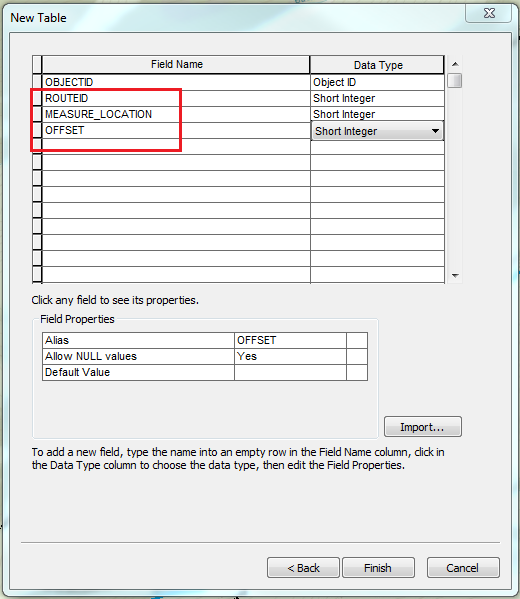
- Click Finish. A geodatabase table is created within the file geodatabase and located in Table Of Contents.
- Repeat steps 3a through 3c to create another event table for the negative offset points. Name the table Offset_Negative.
Note:
As there are no direct tools to create transects across the route feature class, perpendicular points are created on both sides of the route feature class before they are connected to form perpendicular transects along the route feature class. Points located on the right of the route are the positive offsets while points located on the left are negative offsets.

So point event tables, instead of line event tables, are created to locate the position of perpendicular points along the route feature class. Refer to ArcMap: An overview of creating and editing event data or ArcMap: About creating event tables in ArcCatalog for more information.
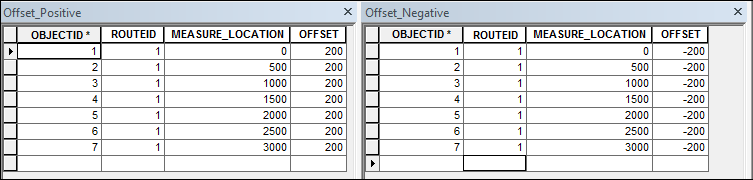
- Define the values for the event tables.
- In an edit session, open the attribute table of the point event table.
- Manually enter the information. Save the edits.
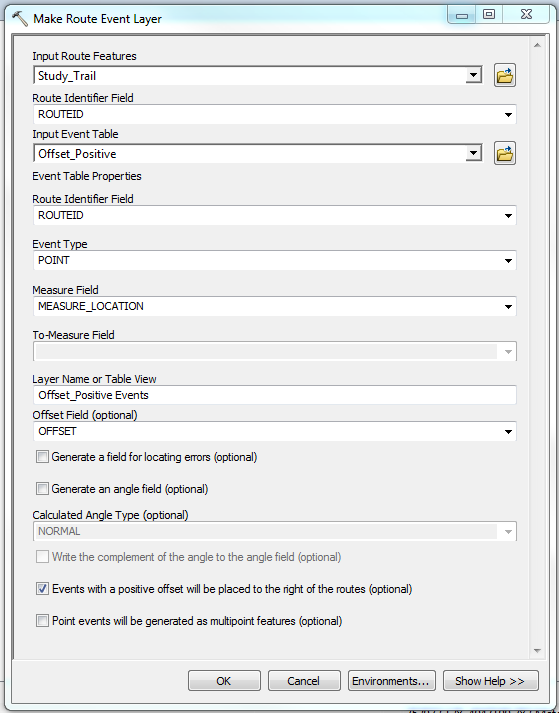
- Project the perpendicular points on the map using the Make Route Event Layer tool. These perpendicular points are the vertices of the line transects.
- In Input Route Features, specify the route feature class as Study_Trail.
- Specify the Route Identifier Field as ROUTEID.
- In Input Event Table, select the point event table created and specify it as Offset_Positive.
- In Event Type, select POINT.
- In the Measure Field, specify the field to locate the position of points along the route feature class as MEASURE_LOCATION.
- Specify Offset Field as OFFSET.
- Check the Events with a positive offset will be placed to the right of the routes option.
- Click OK. Positive offset points are created on the right side of the route.
- Repeat steps 5a through 5h to create the negative offset points.
Note:
The event layer created is temporary and the output is not stored in the file geodatabase. To make the event layer permanent, export the event layer to a feature class.
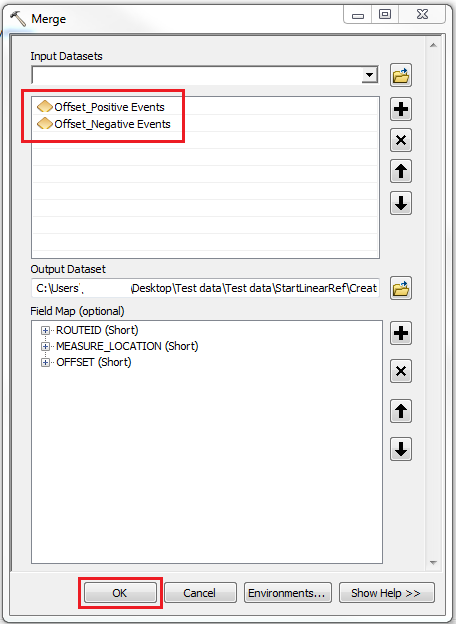
- Use the Merge tool to combine both positive and negative offset event layers into the same feature class. Name the output feature class Offsets_Merge.
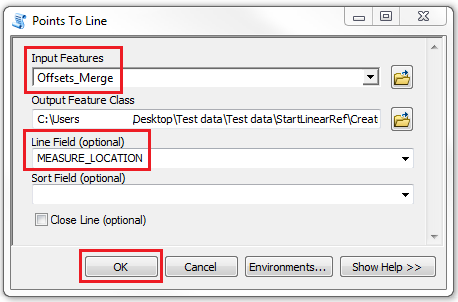
- Use the Points To Line tool to create perpendicular transects connecting the positive and negative offsets.
- In Input Features, select the merged event layers created in step 6. In this example, it is Offsets_Merge.
- In Line Field, select the field containing the location value. In this example, it is MEASURE_LOCATION. Click OK.
Article ID:000012318
- ArcMap
Get help from ArcGIS experts
Download the Esri Support App
Related Information
Discover more on this topic
Search for related information
Find training related to this topic
Explore ideas and give feedback