HOW TO
Import an image as a style in ArcMap
Summary
ArcMap allows symbolizing features using a custom image. This article shows how to import an image to ArcMap as a picture marker symbol and use the image as a style in the map.
Procedure
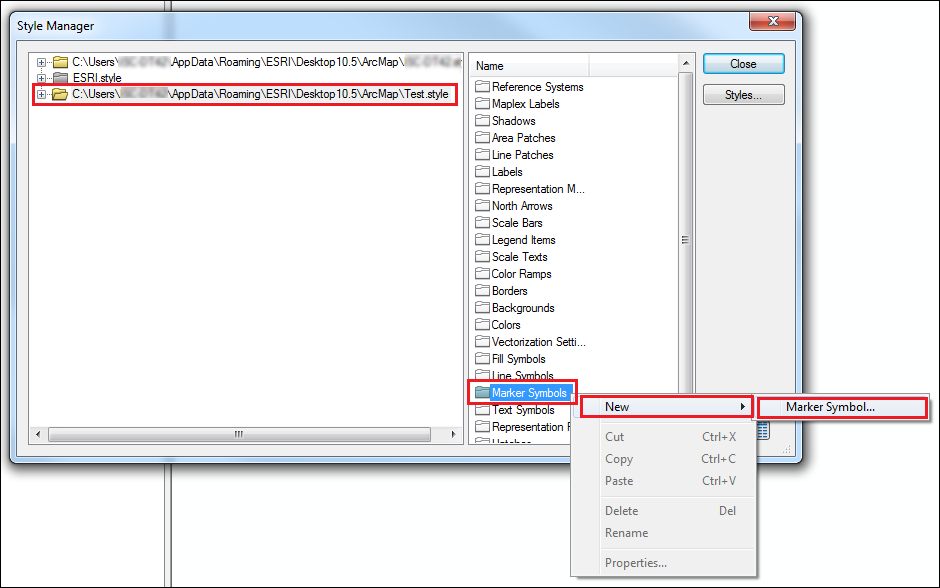
- Start ArcMap with a new empty map and click Customize > Style Manager
Note:
Creating a personal style for custom symbols is recommended. To create a new style, refer to ArcMap Help: Creating new styles.
- In the Style Manager dialog box, click the newly created style. On the right side, under Name, the list of folders are displayed.
- Right-click the desired folder (for example, the Marker Symbol folder) to store the new symbol and select New > Marker Symbol
- In the Symbol Property Editor dialog box, change the Type to Picture Marker Symbol, and click the Picture icon to import the image.
- If necessary, adjust the display of the picture to center it in the crosshairs in the Preview section. Make any further modifications such as Size, Color, Angle, etc., and click OK.
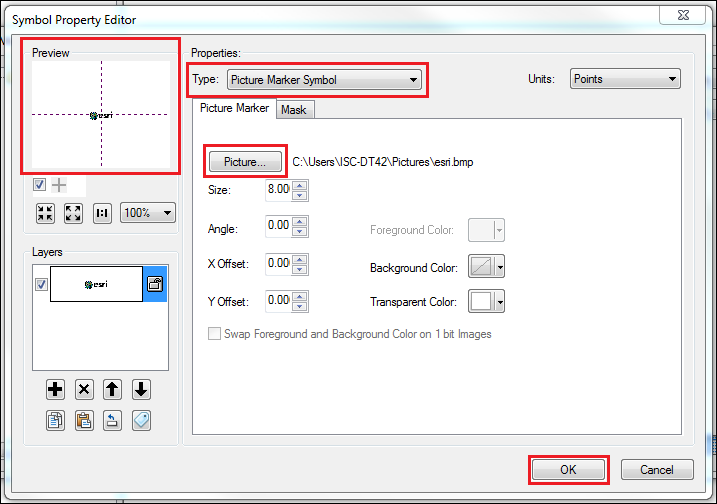
- Click Close to close the Style Manager dialog box.
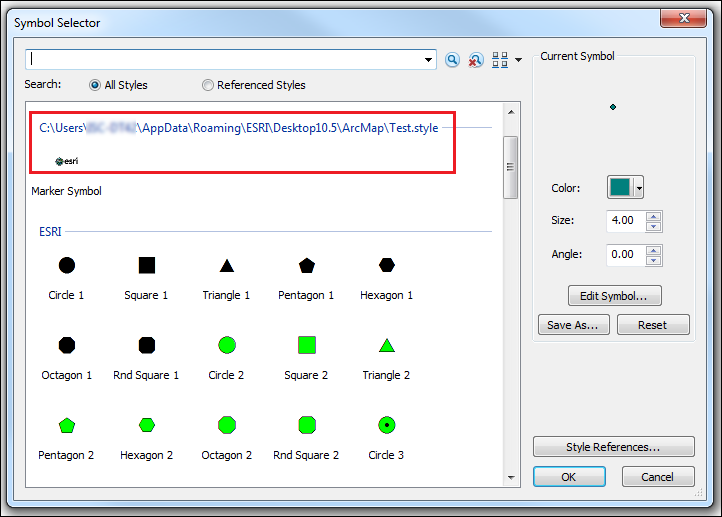
To apply the new symbol to a layer, click the layer symbology in the Table of Contents to open the Symbol Selector dialog box. The picture marker symbol created using the above steps is available under the newly created style section.
Article ID:000008629
- ArcMap
Get help from ArcGIS experts
Download the Esri Support App
Related Information
Discover more on this topic
Search for related information
Find training related to this topic
Explore ideas and give feedback